


Buying a used Class A motorhome can be the adventure of a lifetime — or a costly mistake — depending on how thorough you are in your inspection. A Class A isn’t just a vehicle; it’s your rolling home, your road trip headquarters, and potentially one of the largest purchases you’ll make after a house.
This detailed buyer’s checklist will guide you through every step of the process — from exterior inspection to mechanical systems, interior checks, and document verification — so you can buy with confidence and avoid expensive surprises.
1. Exterior Inspection
A good exterior inspection is about more than appearance — it’s your first defense against hidden problems like structural damage and water leaks.
Undercarriage
- Slide under with a creeper and inspect the frame, suspension mounts, brake components, and steering linkage.
- Look for surface rust (treatable with Wool Wax or POR-15) and watch for deep corrosion or flaking metal, which could indicate structural issues.
- Check for worn or broken parts like rotors and brake calipers.
- Be alert for signs of pests (nests, chewed wiring).
Pro Tip: Fresh undercoating might be hiding rust — ask why it was applied.
Lights
- Test all exterior lights: headlights, taillights, turn signals, and clearance lights.
- Dim or misaligned headlights may require adjustment or replacement.
- Check interior compartment lighting in storage bays.
Exterior Walkaround
- Look for dents, scratches, or panel damage.
- Watch for mismatched paint or uneven gaps — signs of past repairs or accidents.
- Feel for bubbling paint or delamination on fiberglass siding.
Roof and Roof Cap
- Walk the roof carefully.
- Inspect for cracks, soft spots, or deteriorated seals around vents and antennas.
- Check front and rear caps for stress cracks or impact damage.
Tires
- Inspect for uneven tread wear.
- Check sidewalls for cracks, bulges, or dry rot.
- Find the DOT code (e.g., “2319” = 23rd week of 2019).
- Replace tires older than 7 years regardless of tread.
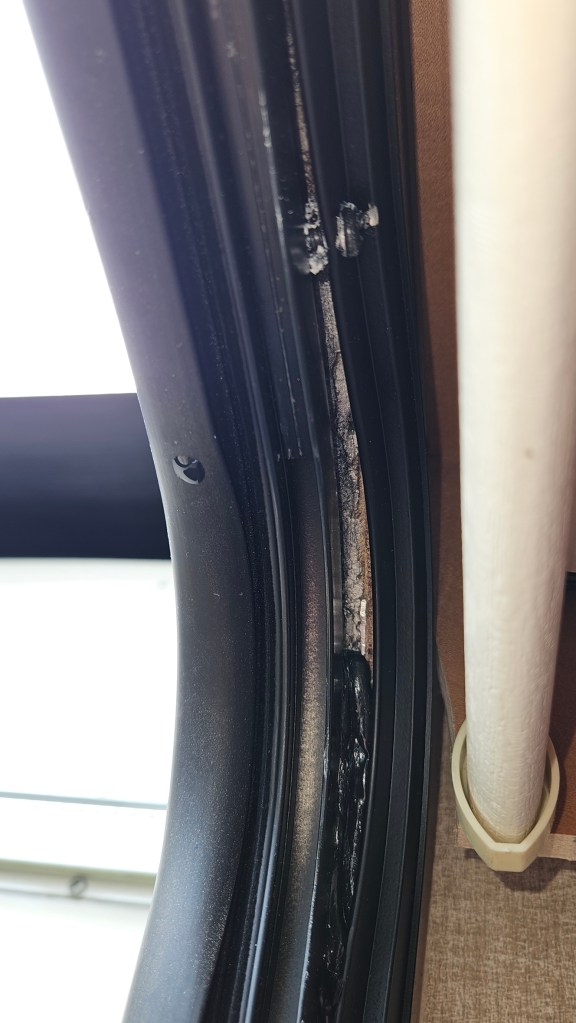
Windows and Slides
- Ensure windows open and close smoothly with intact seals.
- Operate all slide-outs; listen for grinding noises.
- Misaligned slides can signal frame flex or mechanical wear.
Doors
- Test all entry, bathroom, and storage doors.
- Misaligned doors may mean chassis or frame problems.
Mirrors
- Confirm mirrors are stable, adjustable, and crack-free.
Antennas
- Test for functionality and check for physical damage.
Glass
- Inspect the windshield and windows for chips or cracks.
- Signs of windshield replacement could point to past accidents — verify with a vehicle history report.

Propane Tank
- Look for leaks, rust, or dents.
- Check valves and fittings for secure attachment.
Hitch and Trailer Wiring
- Check for loose bolts, cracks, or wear on the hitch.
- Test trailer wiring for correct operation.
2. Mechanical and Systems Inspection
Your RV’s engine, drivetrain, and onboard systems are the backbone of reliability. Neglect here can be costly.
Drivetrain
- Inspect the engine, transmission, and differential for leaks.
- Check belts and hoses for cracks.
- Listen for unusual noises during idle and acceleration.
- Review maintenance records for regular service history.
Leveling System
- Test all hydraulic or electric jacks.
- Look for hydraulic fluid leaks and ensure smooth, even extension.
Steps
- Extend and retract steps; worn gears (especially Lippert) may require replacement.
- Check for rust or bent linkages.
Electrical
- Test shore power connection, breakers, and outlets.
- Operate stereo, navigation, and speakers.
- Replace faulty speakers or electronics.
Plumbing
- Pressurize the water system and check all fittings.
- Inspect Saniclean or similar systems for leaks, especially at the rear.
- Look for cracked PEX lines or loose connections.
Holding Tanks
- Check fresh, gray, and black tanks for leaks.
- If there’s a sewage odor:
- Inspect black tank vent stack for clogs.
- Verify valve seals are intact.
- Flush tanks with a high-pressure wand.
Refrigerator and Ice Maker
- Test on both propane and electric.
- Ice makers often fail due to bad water valves or blocked lines.
Toilet
- Check for proper flushing and a good seal.
Sinks and Shower
- Run water, check drainage, and inspect under sinks for leaks.
- Check shower pan for cracks or softness.
Air Vents and Registers
- Make sure vents are unobstructed and delivering airflow.
3. Interior Inspection
The interior tells the hidden story of the RV’s care.
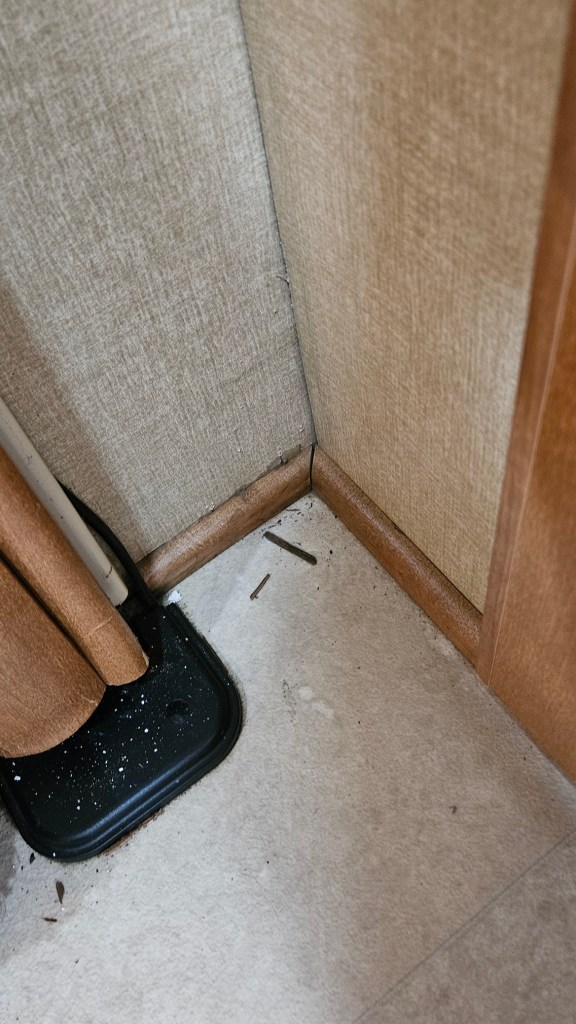
Leaks
- Look for water stains, soft spots, and mold on ceilings, walls, and floors.
- Use a moisture meter to detect hidden damage.
Under Beds and Slides
- Check for wood chips, foam debris, or pest droppings.
Overall Condition
- Inspect cabinets for loose hinges or swelling from water exposure.
- Check upholstery and flooring for tears or excessive wear.
- Walk barefoot to detect soft flooring.
4. Documentation and History
Vehicle History
- Pull your own CarFax or AutoCheck.
- Look for signs of accidents, flood damage, or prior commercial use.
Professional Inspection
- Hire a certified RV inspector for mechanical and structural evaluation.
- Use their report to negotiate price reductions.
5. Addressing Common Problems
If you find issues, don’t panic — they may be bargaining chips.
Rusted Undercarriage
- Clean, degrease, and treat with Wool Wax or POR-15.
- Get professional assessment for severe rust.
Sewage Odor
- Check vent stacks, valves, and seals.
- Use enzyme-based treatments after flushing.
Windshield Replacement
- Inspect seals and frame for leaks or rattles.
Misaligned Slide or Door
- Lubricate rails, inspect tracks, and adjust hinges.
Saniclean Leak
- Pressurize system, tighten fittings, or replace cracked lines.
6. Tips for a Smarter Purchase
- Test Drive in Real Conditions
- Highway speeds, rough roads, and turns reveal hidden issues.
- Operate Every System
- Connect to shore power, run AC, heat, slides, and water.
- Negotiate With Facts
- Every flaw is a discount opportunity.
- Budget for Immediate Repairs
- Expect $1,000–$5,000 in initial fixes.
- Join RV Forums
- Communities like iRV2 and RV.net are invaluable.
Final Thoughts
A used Class A RV can be a smart buy — if you inspect thoroughly. Use this checklist, take your time, and don’t hesitate to walk away if the condition or price doesn’t match your expectations.
The right coach will pass inspection, fit your budget, and get you rolling toward your next adventure with confidence.
